

Guacamole is a browser based remote access tool that provides easy access to hosts in all your VPCs, across accounts and regions. Access to Windows desktops (RDP), Linux terminals (SSH) and Kubernetes Pods is supported. No client software needed, a modern browser is all you need. This also enables administrators in corporate environments behind restrictive proxies to access remote servers on AWS.
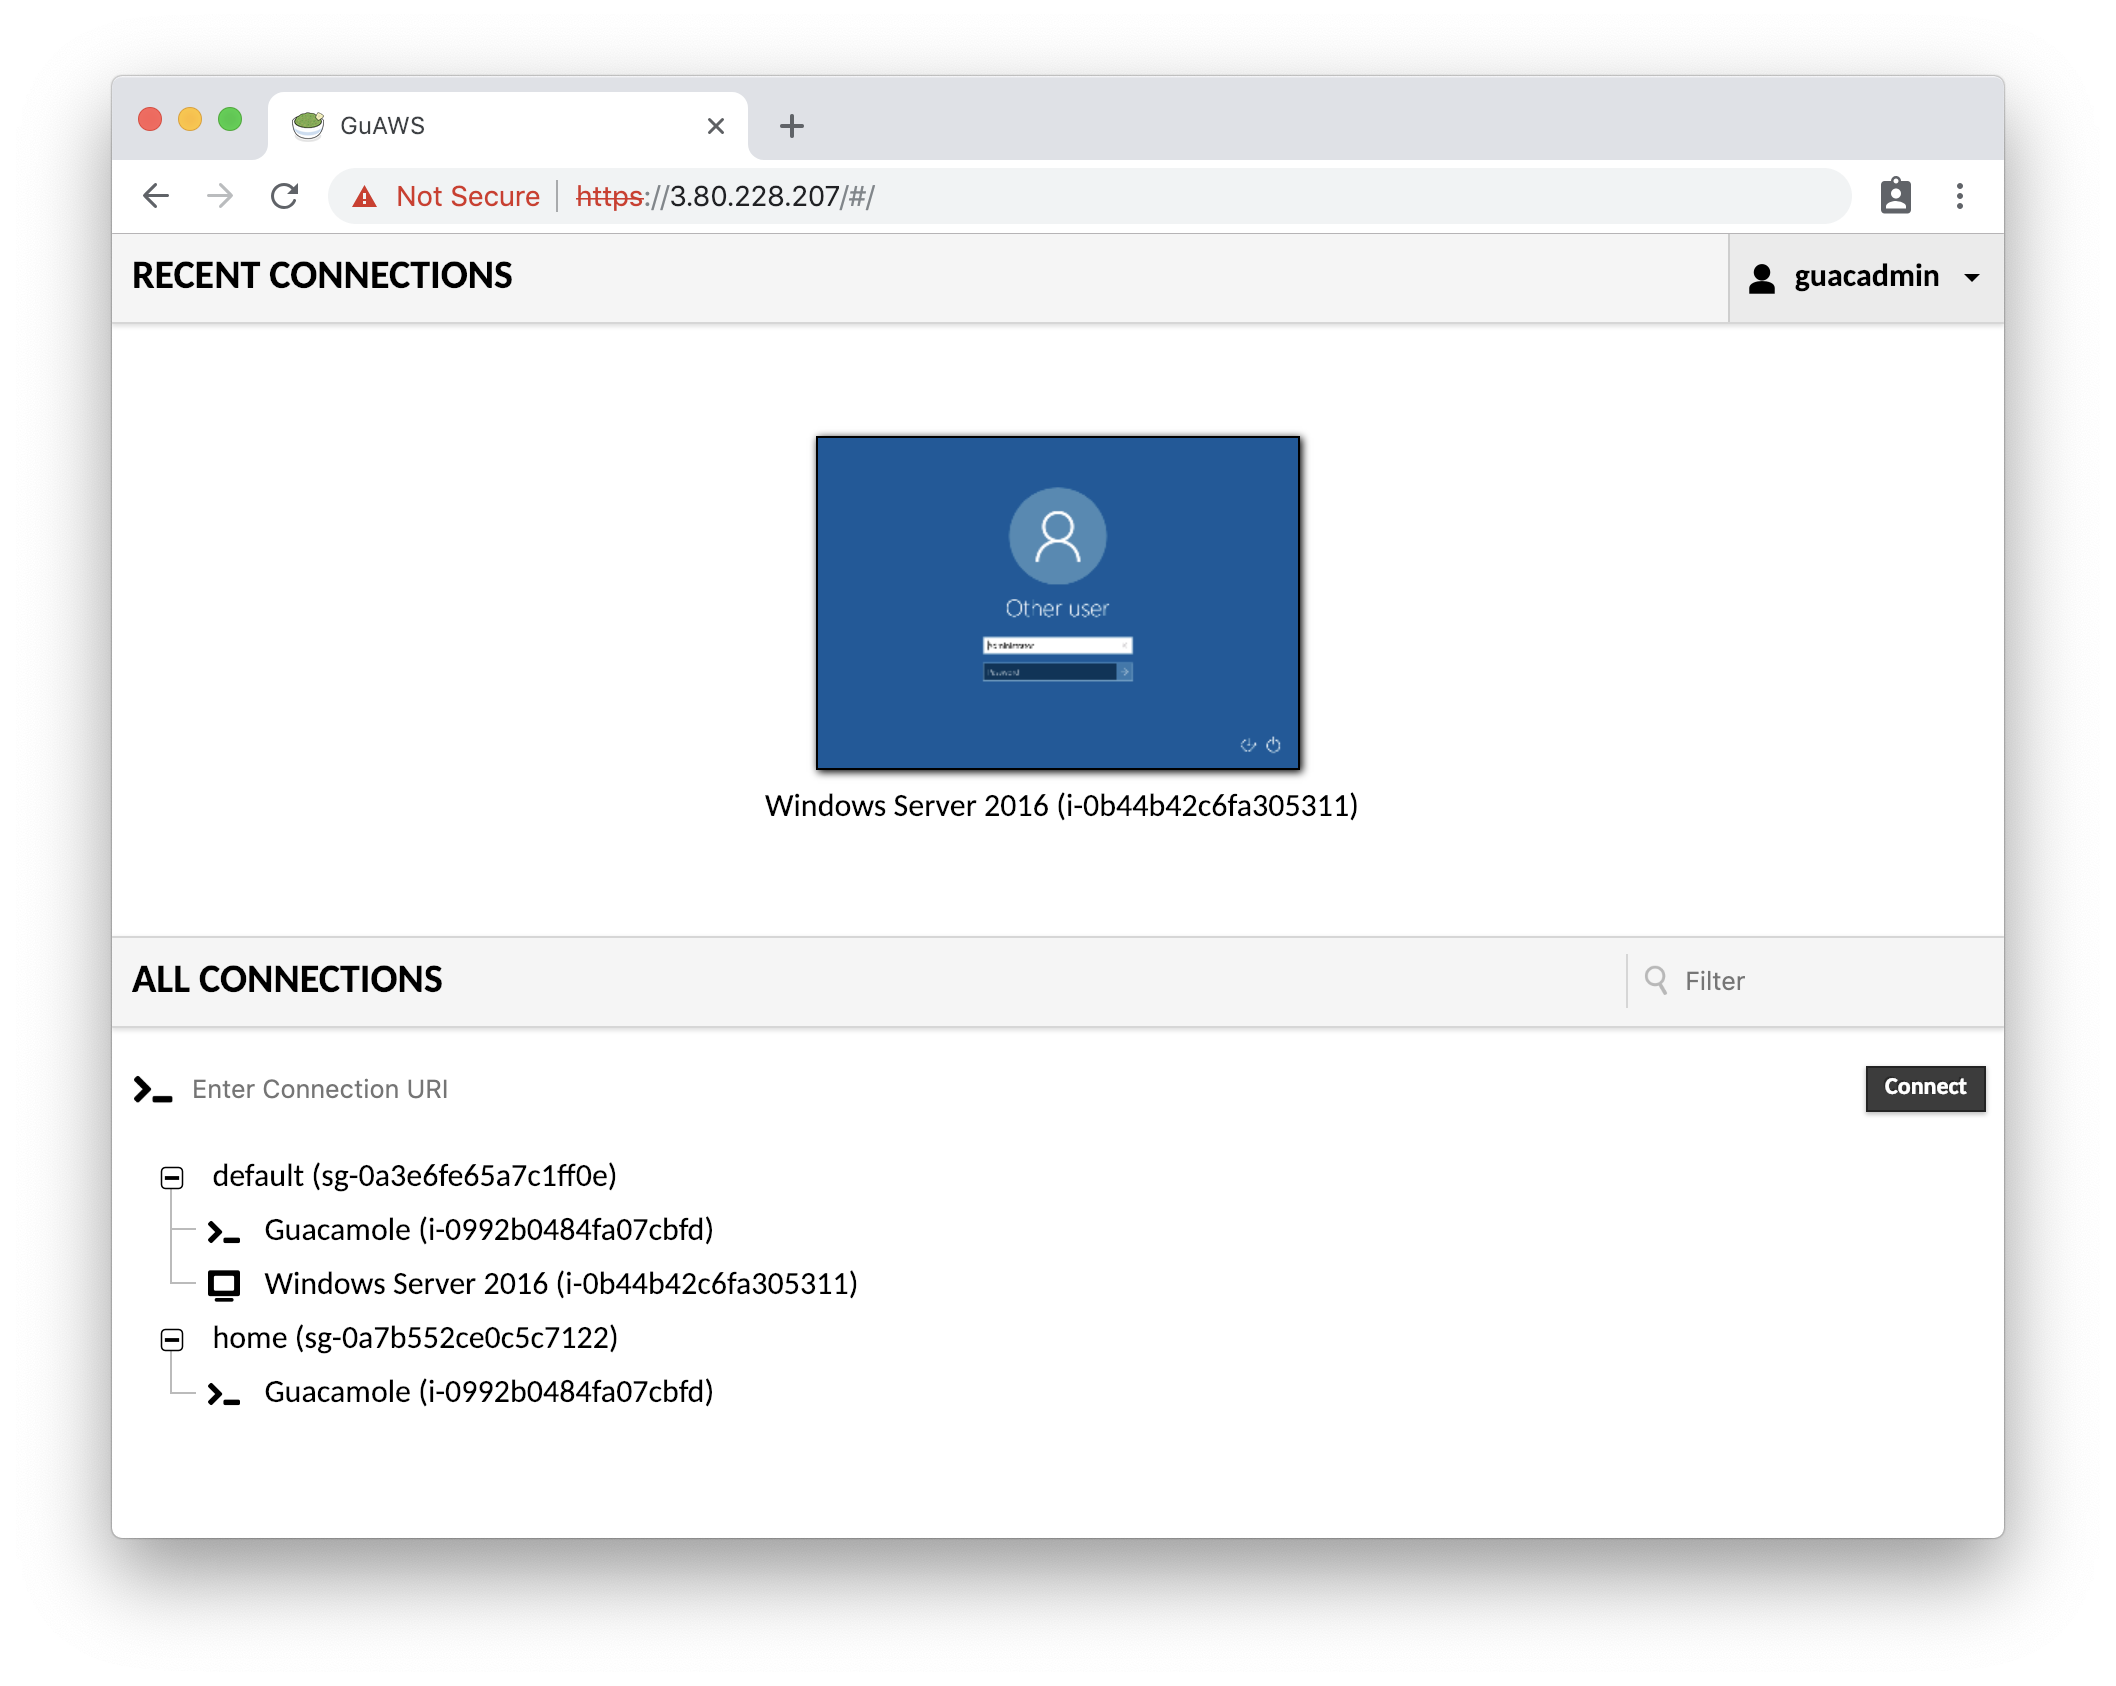
This product ships with version 1.1.0 of the popular open-source HTML5 RDP and SSH client Apache Guacamole (http://guacamole.apache.org/) and GuAWS, an agent that queries your AWS environment to automatically discover running instances. GuAWS is continuously scanning your VPC for new instances using the AWS API. It also scans across VPC, account and regional boundaries where VPC Transit Gateways or VPC Peering Connections are used. Your servers are organized by VPC and security group which makes it easy to find the right instance and manage access. Additionally, connections opened by users are logged to CloudWatch Logs.
A user management system provides fine grained access control to individual groups or instances. More details can be found at http://guacamole.apache.org/doc/gug/administration.html#user-management. Single sign-on authentication can easily be added through Amazon Cognito or other OpenID compliant providers such as Auth0, Okta or Duo. Multi-Factor authentication is provided by the built-in TOTP plugin that works with Google Authenticator or similar apps. Detailed instructions can be found in the Authentication section.
The instance must be launched with an IAM instance profile to retrieve running instances from the AWS API and to push the audit log to CloudWatch Logs. You can also choose to run this AMI without the instance profile applied. In that case the automatic discovery of instances and audit log will not be available.
The Guacamole web interface will only be able to discover instances it can actually open a connection to. Make sure that the Guacamole instance can establish a connection with the target instance via security group rules.
Using CloudFormation
Simply follow this link to launch the stack. This stack will create the required EC2 instance profile with the necessary permissions.

Manually create Instance Profile
If you cannot use CloudFormation you can also create the instance profile manually by following these steps:
Switch to the JSON tab and paste the following policy. This policy grants the instance access to CloudWatch Logs to push the connection history and the ability to assume an IAM role in any account where you are running instances.
{
   "Version": "2012-10-17",
   "Statement": [{
       "Action": "sts:AssumeRole",
       "Resource": "arn:aws:iam::*:role/EC2ReadOnlyAccessRole",
       "Effect": "Allow"
   }, {
       "Action": [
           "logs:CreateLogGroup",
           "logs:CreateLogStream",
           "logs:PutLogEvents",
           "logs:DescribeLogStreams"
       ],
       "Resource": "*",
       "Effect": "Allow"
   }]
}
The Guacamole agent is able to discover instances in AWS accounts other than the AWS account it was launched in. It will query the VPC for Transit Gateway attachments and VPC Peering Connections. If the VPC is connected to a VPC in a different account, the Guacamole agent will try to assume the role EC2ReadOnlyAccessRole in the target account to discover additional EC2 instances. If this role doesn't exist, the agent will log a warning.
To enable cross-account discovery of EC2 instances, create the following IAM role, either via a CloudFormation template or manually. Allow up to five minutes for the Guacamole agent to pick up the new role. If cross-account discovery doesn't seem to work. log on to the Guacamole EC2 instance and execute guawsctl logs -f guaws to retrieve the log files of the agent. Monitor the logs for error messages.
CloudFormation Template
This stack must be deployed in the AWS account that you want to make discoverable to the Guacamole agent.
Parameters:
Manually Create IAM Role
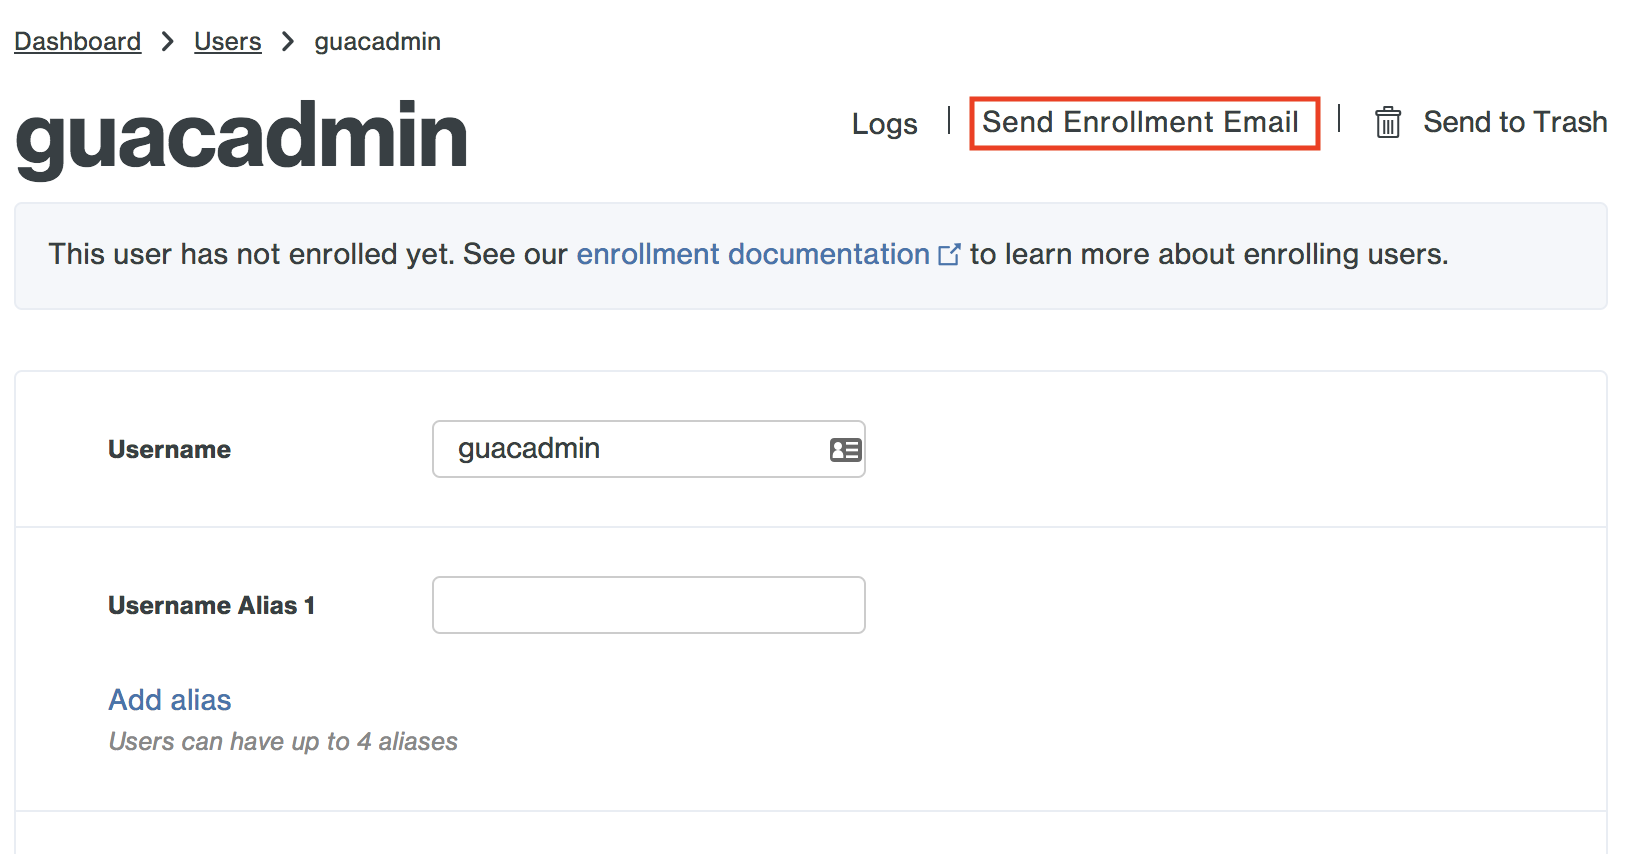
The instance should be fully booted within 5 minutes after launch. Access the application via a browser at https://[public_dns]/ (or https://[private_ip]/ if the instance was launched in a private VPC). The default user is guacadmin, the default password is the instance ID.
Most browsers will display a certificate warning. This warning is letting you know that the certificate was self-signed instead of signed by a trusted Certificate Authority. You can safely ignore the warning as it doesn't impact the security of the connection by clicking on "Continue to this webpage" (Internet Explorer) or "Advanced" and then "Proceed to website" (Chrome).
To connect to the underlying operating system of the EC2 instance connect via SSH with the username ec2-user.
This service will listen for HTTP and HTTPS traffic on port 80 and 443, respectively. Any attempt to connect via port 80 will upgrade the connection to HTTPS. The HTTPS connection is protected with a self-signed certificate.
Best practice is to put an Application Load Balancer (ALB) in front of this instance which allows you to put a properly signed certificate in place. The health check must be configured with protocol HTTPS, port 443 and path /. Please have a look at the Guacamole Cluster which provisions all of these components through a CloudFormation template.
Alternatively, the SSL certificate on the server can be replaced as well. The certificate and private key are stored at /home/ec2-user/guaws/nginx/ssl/. Run guawsctl restart nginx to restart the web server.
The AMI ships with the Let's Encrypt certbot client preinstalled. To obtain certificates from Let's Encrypt, execute the following steps:
ec2-user.guawsctl run certbot certonly --webroot --webroot-path /var/www/letsencrypt and follow the instructions on the screen.{DOMAINNAME} with your domain name). sudo rm -f /home/ec2-user/guaws/nginx/ssl/server.*
sudo ln -s /etc/letsencrypt/live/{DOMAINNAME}/fullchain.pem /home/ec2-user/guaws/nginx/ssl/server.crt
sudo ln -s /etc/letsencrypt/live/{DOMAINNAME}/privkey.pem /home/ec2-user/guaws/nginx/ssl/server.key
guawsctl restart nginx/etc/cron.daily/certbot.sh). If you want to manually renew the certificates simply execute guawsctl run certbot renewSessions can be recorded graphically. Screen recording needs to be enabled in the connection settings. The recording path needs to be set to /opt/guacamole/recordings. Recordings will be written in a proprietary format that needs to be encoded before it can be played back. Use the guacenc utility to encode the raw stream into a m4v video file.
We recommend that you attach an additional EBS volume to the guacamole if you are using session recording extensively. The raw session recording can become quite large and you will eventually run out of disk space on the root volume which might impact the availability of the service. Mount the additional EBS volume under /opt/guacamole and create a folder recordings with ownership set to ec2-user.
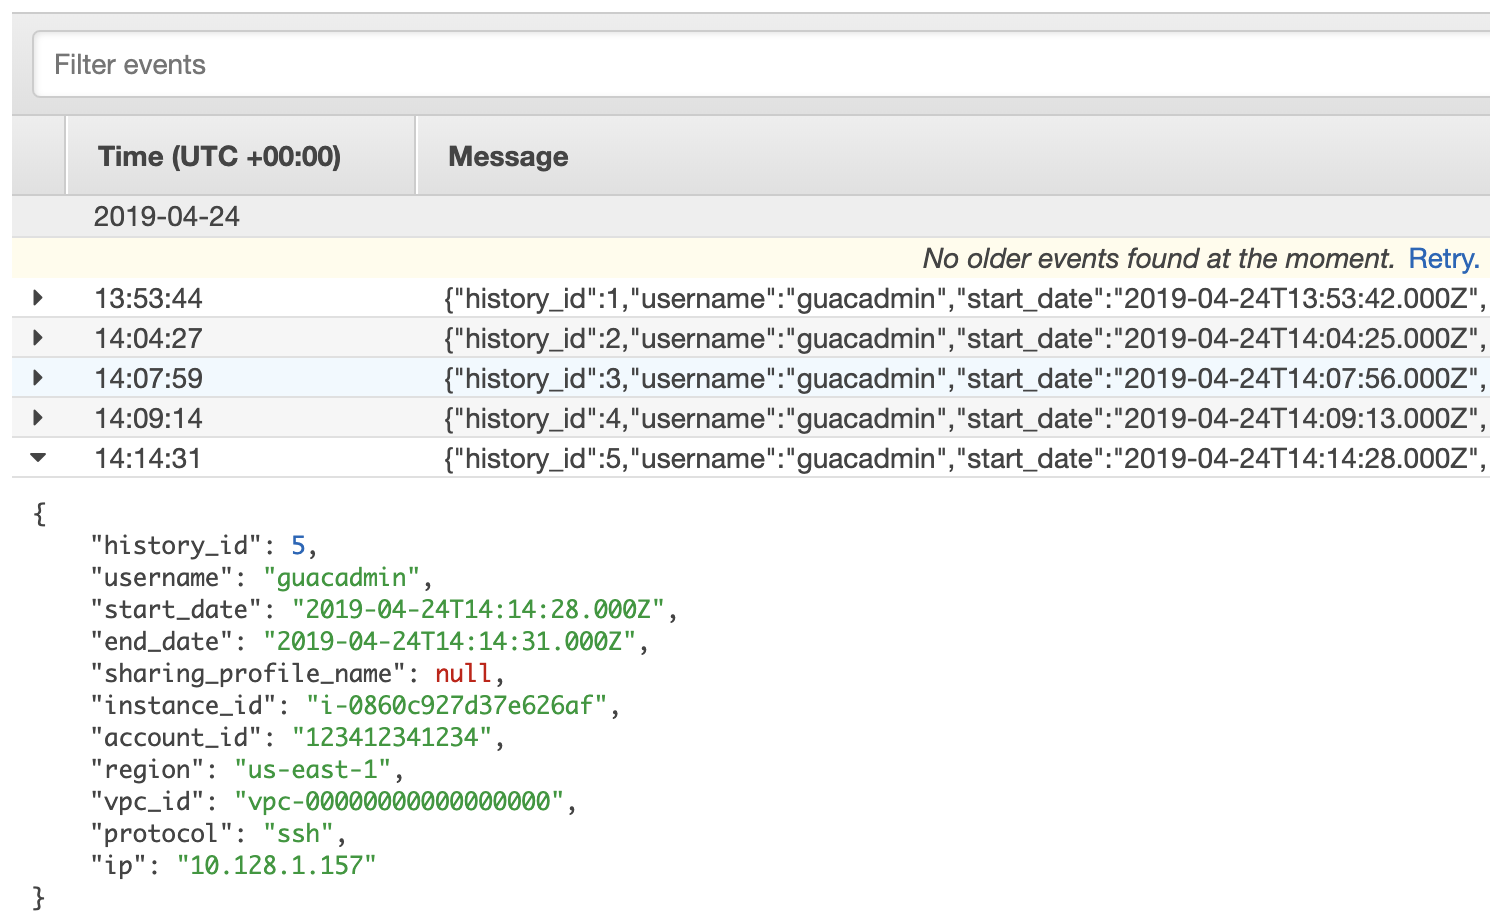
The application will write an Audit Log of users who have signed in and opened connections to AWS CloudWatch Logs (if the instance profile was provided). The audit log contains information about the session start date, end date, instance id, IP and protocol of the session.
The Guacamole server also offers a RESTful API to access and modify the underlying data store. API calls are secured using an access token which can be obtained by calling the /api/tokens endpoint. The following bash script assumes that you are executing the calls from within the Guacamole instance. You can replace localhost with the hostname of the Guacamole instance if these requests are made remotely.
# Replace PASSWORD with the password of the guacadmin user
# Tokens expire after 60 minutes of inactivity
export TOKEN=$(curl -s -k -X POST https://localhost/api/tokens -d 'username=guacadmin&password=PASSWORD' | jq -r .authToken)

# Create a new user
curl -s -k -X POST -H 'Content-Type: application/json' https://localhost/api/session/data/mysql/users?token=$TOKEN --data-binary '{"password":"testpassword","username":"newuser","attributes":{}}'

# Update the password of the user
curl -s -k -X PUT -H 'Content-Type: application/json' https://localhost/api/session/data/mysql/users/newuser?token=$TOKEN --data-binary '{"password":"testpassword","username":"newuser","attributes":{}}'

# Get connection groups and connections, required for the next step
curl -s -k -X GET -H 'Content-Type: application/json' /api/session/data/mysql/connectionGroups/ROOT/tree?token=$TOKEN

# Update permissions on groups and connections
curl -s -k -X PATCH -H 'Content-Type: application/json' https://localhost/api/session/data/mysql/users/newuser/permissions?token=$TOKEN --data-binary '[{"op":"add","path":"/connectionPermissions/1","value":"READ"},{"op":"add","path":"/connectionGroupPermissions/1","value":"READ"},{"op":"add","path":"/connectionGroupPermissions/2","value":"READ"}]'
With Amazon Cognito, your users can sign in through social identity providers such as Apple, Google and Facebook or through enterprise identity providers such as Microsoft Active Directory via SAML or OpenID.
Access to Guacamole can further be restricted to only allow Cognito users that are members of a certain group. Additionally, Cognito provides Multi-Factor Authentication (MFA) via SMS text messages or time-based one-time passwords (TOTP).
Please follow the instructions in this dedicated guide.

TOTP is an open standard for multi-factor authentication. The user needs to have a mobile client installed such as the free Google Authenticator or Authy. To enable TOTP for Guacamole, please follow the following steps.
ec2-user.totp extension into the right location. Execute from /home/ec2-user:sudo ln -s ../available-extensions/guacamole-auth-cognito-1.1.0/guacamole-auth-totp-1.1.0.jar \
/home/ec2-user/guaws/guacamole/etc/extensions/
sudo systemctl restart guaws.After logging into Guacamole you will be greeted with a setup screen to pair your mobile device. Follow the instructions on the screen. All users will be required to setup TOTP before they can use Guacamole.
Auth0 provides single sign-on across applications with two-factor authentication and federation to enterprise identity providers such as Microsoft Active Directory.
Integration with Auth0 is implemented through the auth-openid extension. This integration works also with other OpenID Connect compatible identity providers.
extensions folder. Execute the following command from /home/ec2-user/guaws. The destination file name (guacamole-auth-0-openid-1.1.0.jar) is important because Guacamole processes the authentication extensions in alphabetical order.sudo ln -s ../available-extensions/guacamole-auth-openid-1.1.0/guacamole-auth-openid-1.1.0.jar \
/home/ec2-user/guaws/guacamole/etc/extensions/guacamole-auth-0-openid-1.1.0.jar
Open /home/ec2-user/guaws/guacamole/etc/guacamole.properties and add these properties
# Replace mytenant.auth0.com with your tenant domain
openid-authorization-endpoint=https://mytenant.auth0.com/authorize
openid-jwks-endpoint=https://mytenant.auth0.com/.well-known/jwks.json
# The issuer to expect for all received ID tokens.
openid-issuer=https://mytenant.auth0.com/
# Include your client ID which can be found in the Settings tab
openid-client-id=
# Replace with the Public Hostname of the EC2 instance
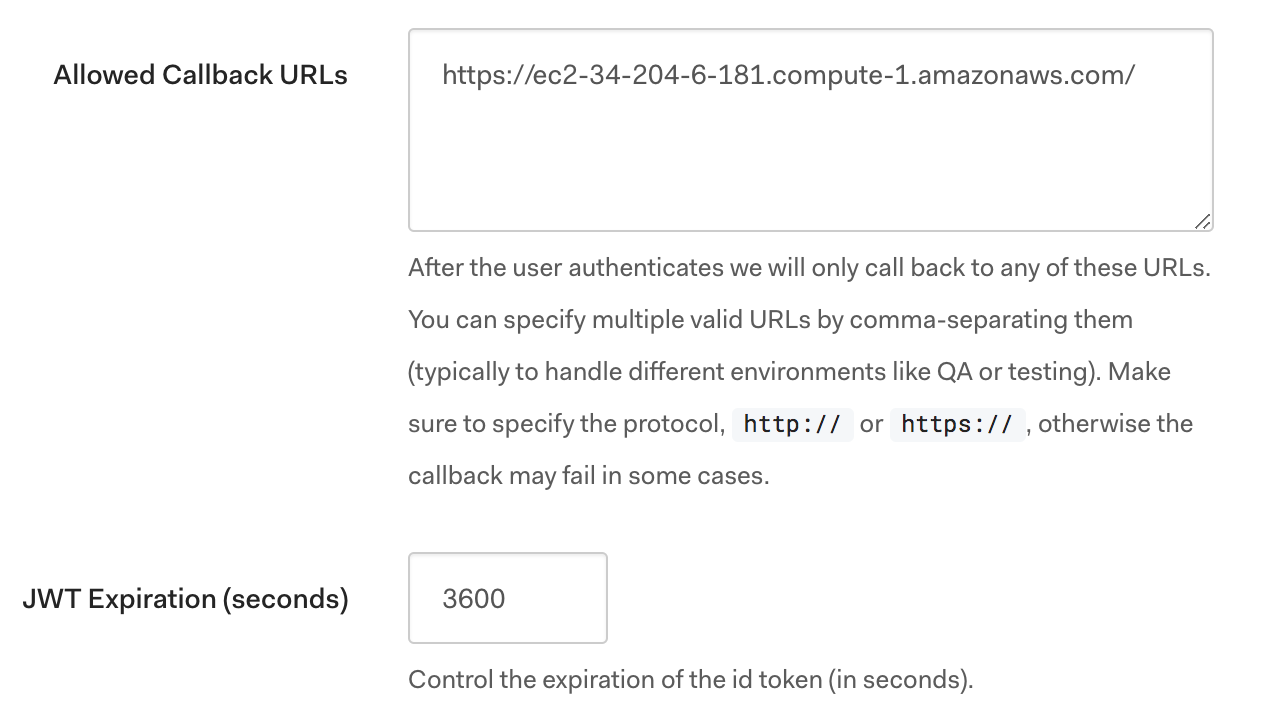
openid-redirect-uri=https://ec2-00-00-00-00.compute-1.amazonaws.com/
guawsctl restart guac. If Guacamole does not come back after the restart command or if signing in fails, review the log files by executing guawsctl logs -f guac.Duo’s Trusted Access platform verifies the identity of your users with two-factor authentication and security health of their devices before they connect to the apps you want them to access.
The Duo authentication extension allows users to be additionally verified against the Duo service before the authentication process is allowed to succeed.
ec2-user and change to the directory /home/ec2-user/guaws.extensions folder.sudo ln -s ../available-extensions/guacamole-auth-cognito-1.1.0/guacamole-auth-duo-1.1.0.jar \
/home/ec2-user/guaws/guacamole/etc/extensions/
guacadmin (user names in Guacamole must match the user names in Duo)
Configure Duo by adding the following lines to /home/ec2-user/guaws/guacamole/etc/guacamole.properties
# the following three configuration keys are provided by Duo
duo-api-hostname=api-xxxxxxxx.duosecurity.com
duo-integration-key=
duo-secret-key=

# a random key that is used by Guacamole to secure the session. Must be at least 40 characters long.
duo-application-key=
guawsctl restart guac. If Guacamole does not come back after the restart command, review the log files by executing guawsctl logs -f guac.Connections support uploading and downloading files from the browser. This feature can be enabled on a connection and is not enabled by default.
To enable file transfer for RDP connection, open the connection in the connection settings and enable Enable drive under Drive Redirection. After connecting to the instance, a new share drive will show up under the name Sharing on Guacamole RDP. This share drive will contain files that you drag and drop into the browser window. You can download any file by moving it into the Download folder within the share drive.
For SSH connections, edit the connection preferences and enable Enable SFTP. You can then either upload files via drag and drop (they will appear in the home directory of the current user) or use the file explorer by pressing Shift + Alt + Ctrl.
For best performance make sure that your environment supports the WebSockets protocol. Some HTTP proxies do not allow WebSockets connections. The service will then fall back to regular HTTP communication which works reasonable well but is not as efficient.
Guacamole is a Java based application. Memory consumption is therefore always a concern. If the application becomes unresponsive or if you experience 502 Bad Gateway error message, stop the instance and upgrade to a larger instance type. The recommended instance type for small teams with 15 concurrent connections is a m5.large.
Instances in the t2 family can become unresponsive if the CPU credits are exhausted. Make sure that you monitor the CPU credit balance if you choose to use this instance type. We recommend to use the t3 family if possible.
The server can be patched manually by accessing the server via SSH. Execute sudo yum update -y to upgrade the operating system. Reboot the instance. The instance also ships with the Systems Manager Agent, allowing you to execute these operations automatically (see https://docs.aws.amazon.com/systems-manager/latest/userguide/systems-manager-patch.html).
We will also be publishing new AMIs after critical security vulnerabilities have been published. As a subscriber to the AMI you will be notified immediately.
The guawsctl command line interface allows you to manage the services installed on the instance. All services are deployed as docker containers. These services are mysql (a MariaDB server), guacd (the Guacamole Server component), guac (the Guacamole web front end) and guaws (the agent that scans the AWS account).
Logs for each service can be retrieved by executing guawsctl logs -f, optionally append the service name to limit the log output to one of the services. Each service can be restarted individually by executing guawsctl restart $service (replace $service with the name of the service).
Why am I prompted for a Key Passphrase when connecting via SSH, even though the private key is not encrypted?
The key format you are using for the private is most likely not supported by Guacamole. Make sure that the first line of your private key is -----BEGIN RSA PRIVATE KEY-----. You can use the ssh-keygen utility to convert a key from a different format in to the PEM format:
ssh-keygen -f ~/.ssh/id_rsa -p -m pem
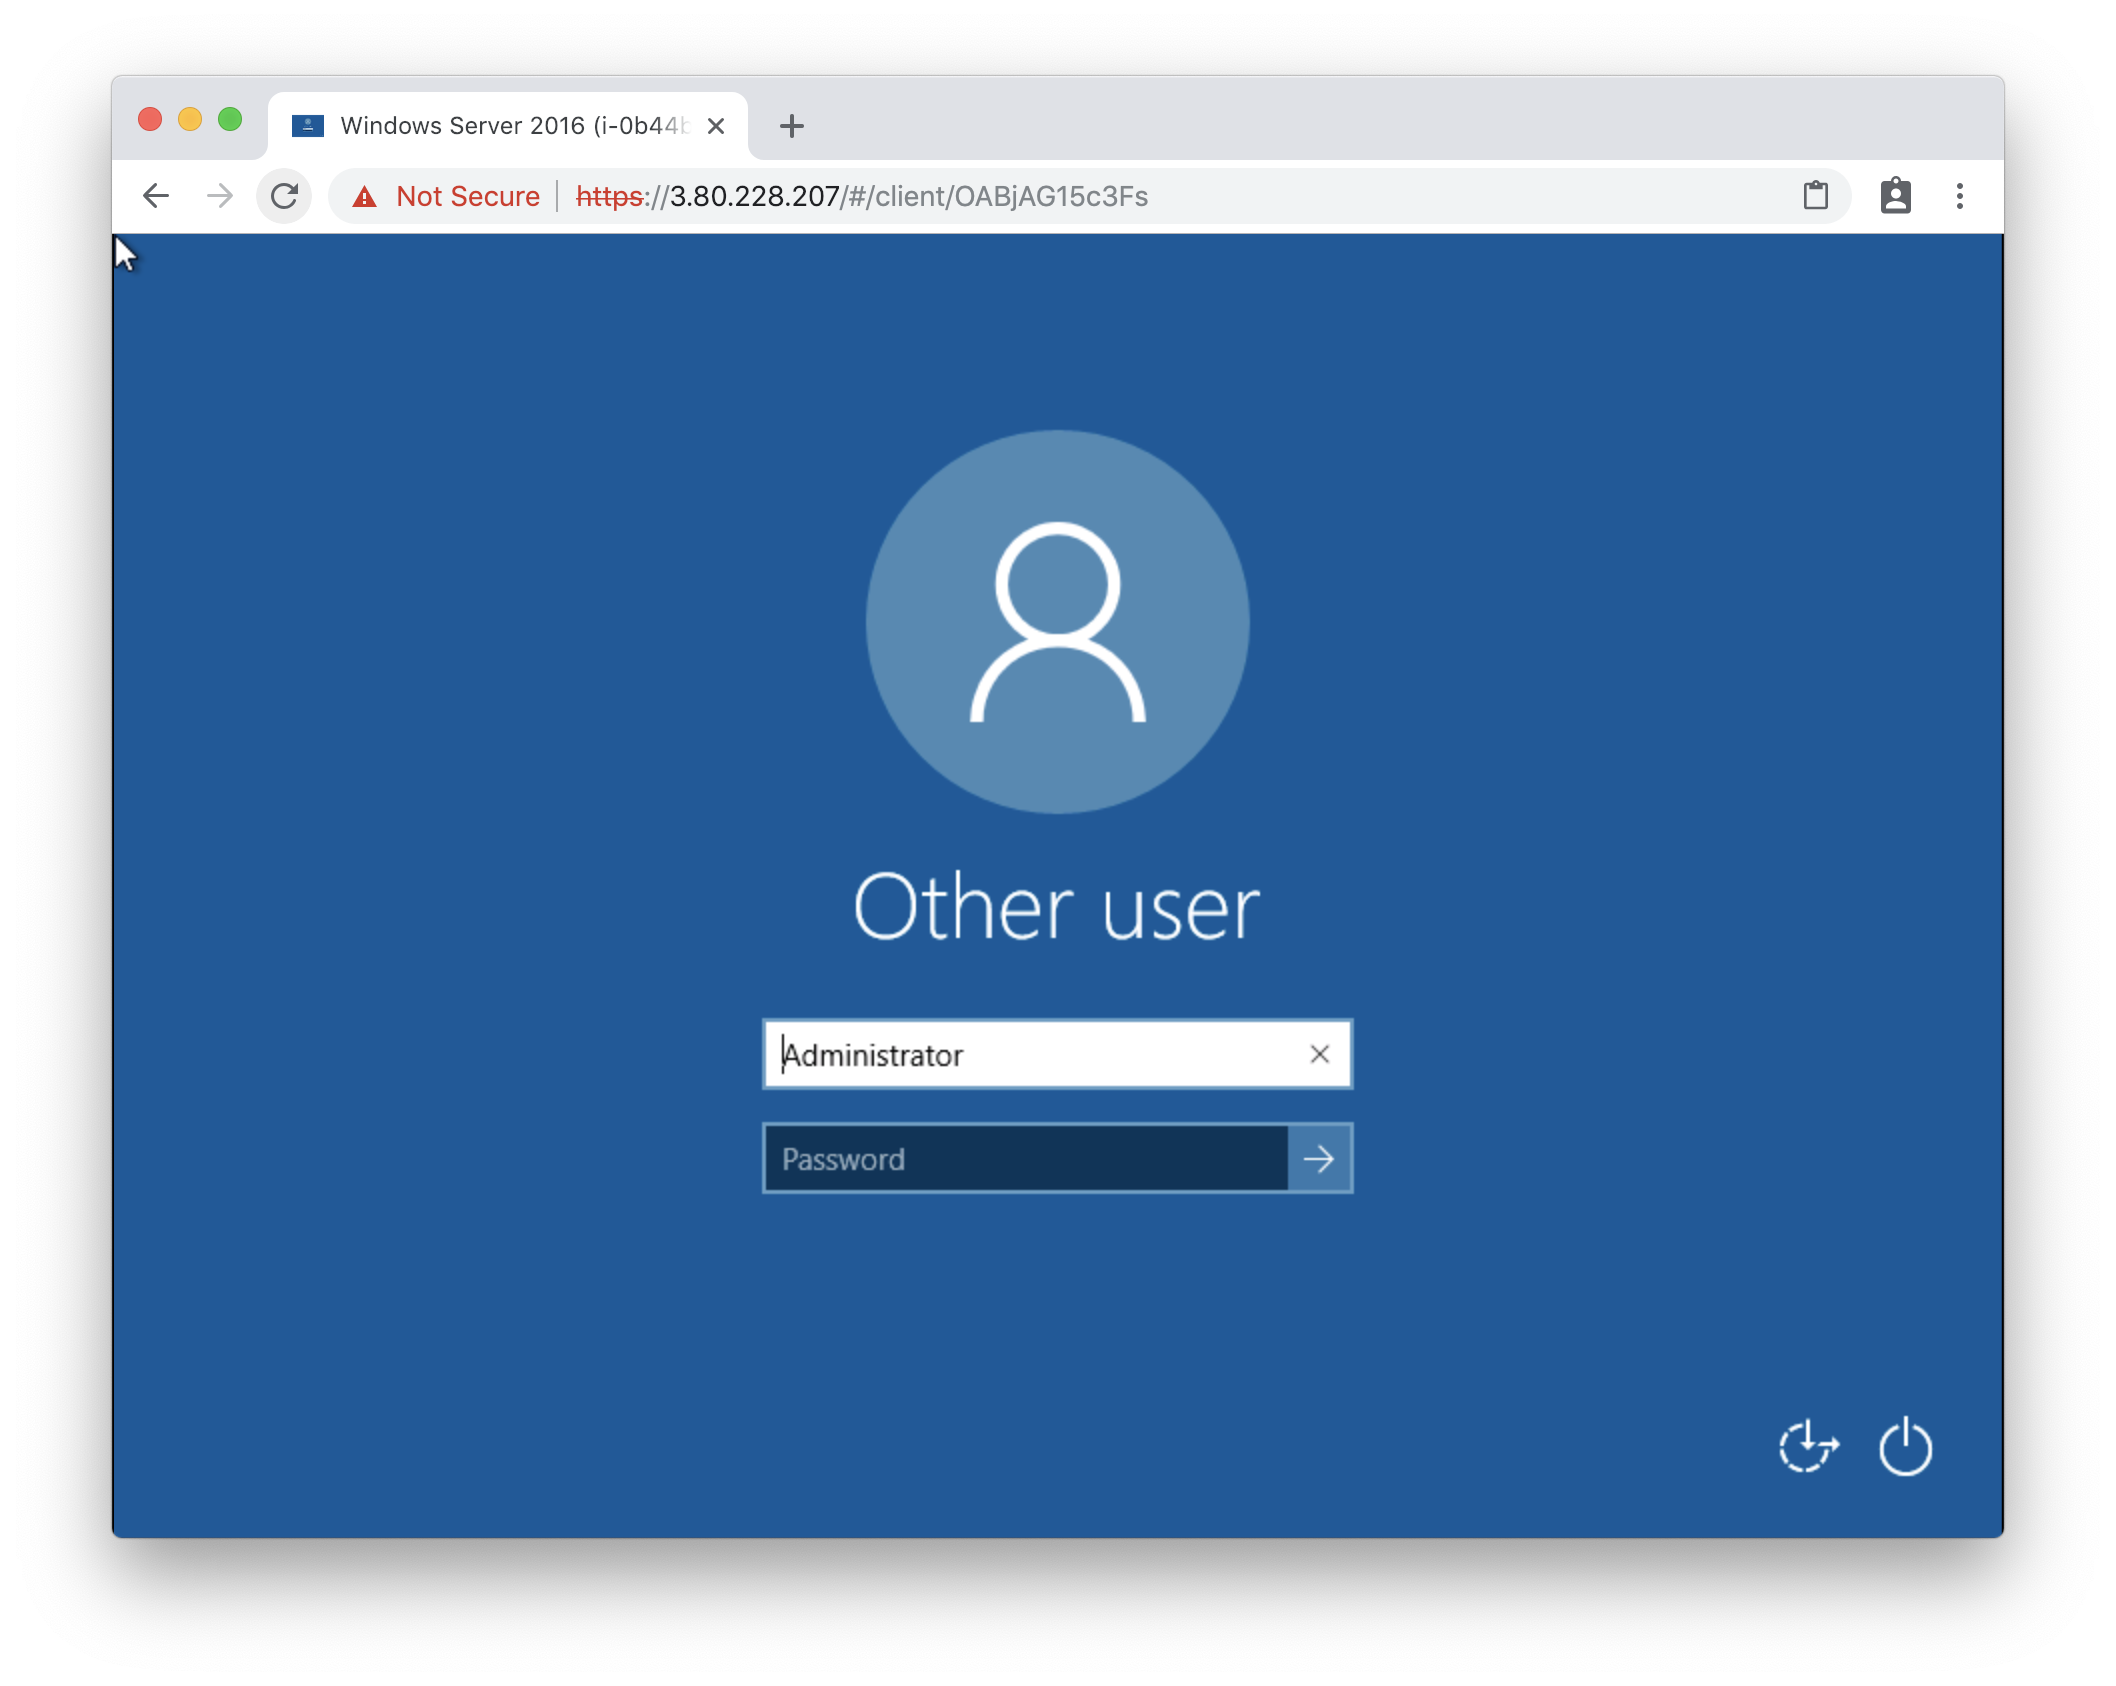
How can I connect to a instance running Windows Server 2016 and later?
Windows Server 2016 and alter made some changes to the way remote authentication works. The interactive log in screen is no longer supported which means that the username and password must be provided when the connection is established. To do this, edit the connection parameters, set the username and password and set the Security Mode to NLA.
Why do I get a "you do not have permission to upload this file" error message when trying to upload files?
Make sure that the Drive Path in the connection settings is set to /tmp/guacd.
For paid support, email sales@netcubed.de for further information. Free support is provided via support@netcubed.de.
For free support, we do not provide a guaranteed response time. However, we do our best to respond to questions within one business day.
Please get in touch at support@netcubed.de for any questions or feature requests.
Make sure you follow the Migrations Guide if you are upgrading from a version 1.5.0 or below.
certbot to provide an easy way to request a certificate (see Security)nginx.conf file in /home/ec2-user/guaws/nginx are now applied immediately with a restart of the nginx container (guawsctl restart nginx) and don't require an image buildguacadmin user was deletedNew Features:
guawsctl which will assist with common maintenance tasksBug Fixes and Improvements:
guawsctl logs -fguacenc utility which can convert raw session recordings into video streams that can be played back.guacamole.properties file possible.Please review your instance profile attached to the instance to match the instance profile described in the Setup Instructions. Additional permissions are required for cross-account discovery of instances and more reliable logging to CloudWatch Logs.
If you only rely on the automatic discovery feature and don't have custom connections, users or groups, you can simply spin up a new instance with the v2.0.4 AMI. It will discover any instances in your environment and you can retire the previous version.
Follow these steps if you want to restore all custom connections, users and groups:
mysqldump --protocol=TCP --skip-lock-tables --add-drop-table --user=guacamole --password=guacamole --databases guacamole > backup.sql
backup.sql to the new instanceguawsctl stop guaws
guawsql < backup.sql
curl -sO http://netcubed-ami.s3-website-us-east-1.amazonaws.com/guaws/v2.1.0/sql/v1-to-v2-0-0.sh
bash v1-to-v2-0-0.sh | guawsql
guawsctl start guaws
Apache Guacamole, Guacamole, Apache, the Apache feather logo, and the Apache Guacamole project logo are trademarks of The Apache Software Foundation.